Why Backing Up Your Mac 🖥️ is Essential
Your Mac holds your life — documents, photos, music, apps, and personal memories. But what happens if your Mac crashes, gets stolen, or a software update goes wrong?
Enter Time Machine, Apple’s built-in, automatic backup solution. Whether you’re upgrading to macOS Sequoia or just want peace of mind, Time Machine helps you safeguard your files and system data with minimal effort.
In this guide, you’ll learn how to:
- Set up Time Machine on your Mac
- Choose the best storage device
- Restore files or entire backups
- Schedule and automate backups
Let’s get started.
⏰ What is Time Machine?
Time Machine is Apple’s default backup software built into macOS. It automatically creates hourly, daily, and weekly backups of your entire system — including:
- System files and settings
- Installed apps
- Personal documents, photos, and videos
- User preferences
With Time Machine, you can restore a single deleted file or your entire Mac to a previous state — just like going back in time.
🧰 What You Need Before Starting
Before setting up Time Machine, here’s what you’ll need:
✅ 1. External Storage Device
You’ll need one of the following:
- External hard drive (HDD/SSD) with USB or Thunderbolt connection
- Time Capsule (older models only)
- Network Attached Storage (NAS) supporting Time Machine over SMB
- Another Mac acting as a backup destination (via file sharing)
Recommended Storage Size: At least twice the capacity of your Mac’s internal drive.
✅ 2. macOS Monterey or Later (Supports Advanced Features)
macOS Sequoia, Sonoma, and Monterey support APFS-based Time Machine backups, offering better speed and reliability than older formats.
🛠️ Step-by-Step: How to Set Up Time Machine on Mac
📌 Step 1: Connect Your External Drive
- Plug your external drive into your Mac.
- You may be prompted:
“Do you want to use this drive to back up with Time Machine?”
Click Use as Backup Disk.
📌 Step 2: Open Time Machine Preferences
- Go to System Settings > General > Time Machine (macOS Ventura & later)
or
System Preferences > Time Machine (macOS Monterey & earlier) - Click Select Backup Disk (or “Add Backup Disk” if already using another one)
- Choose your connected drive from the list
- Click Use Disk
📌 Step 3: Customize Backup Options (Optional)
- Back Up Automatically: Toggle ON for hourly backups
- Encrypt Backups: Enable this for added security (recommended)
- Exclude Items: Click “Options” to exclude folders like Downloads or Movies
📌 Step 4: Let Time Machine Do the Work
Time Machine will now:
- Create an initial full backup (this may take time)
- Automatically make hourly backups for 24 hours, daily for a month, and weekly thereafter
- Delete oldest backups when the disk is full
🔄 How to Restore Files Using Time Machine
🔍 Restore Individual Files
- Open the folder where the file was located (e.g., Documents)
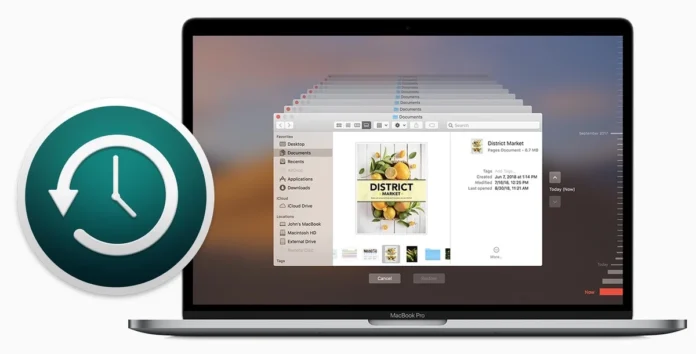
- Click the Time Machine icon in the menu bar > Enter Time Machine
- Use the timeline on the right to scroll through previous backups
- Select the file and click Restore
💻 Restore the Entire System
If your Mac is corrupted or replaced:
- Restart your Mac and hold Command + R to enter macOS Recovery
- Choose Restore from Time Machine Backup
- Connect your backup drive and follow the on-screen instructions
📅 Time Machine Backup Schedule
| Frequency | Details |
|---|---|
| Hourly | For the past 24 hours |
| Daily | For the past month |
| Weekly | For previous months |
| Automatic Deletion | Oldest backups deleted when disk is full |
🔐 Is Time Machine Secure?
Yes. If you enable encryption, Time Machine uses FileVault and AES-128/256-bit encryption, protecting your data even if the drive is lost or stolen.
For best results, always use a password-protected and encrypted drive.
💡 Pro Tips for Better Backups
- Use an SSD for faster backup and restore times
- Don’t unplug the drive while Time Machine is running
- Consider using multiple backup drives (Time Machine supports rotating disks)
- Run Time Machine backups before major updates like macOS upgrades
- Set reminders to verify your backup integrity monthly
🔄 Alternatives to Time Machine
If you want even more control or cloud storage options, here are some alternatives:
| Tool | Key Features |
|---|---|
| Carbon Copy Cloner | Bootable clones, versioning |
| SuperDuper! | Simple full-system backups |
| iCloud Drive | Sync documents/photos, not full system |
| Backblaze | Cloud-based continuous backup |
🧾 Conclusion
Backing up your Mac using Time Machine is simple, automatic, and essential. Whether you want to protect your data from accidents or prepare for the future, Time Machine is a must-have macOS feature you should enable today.
With just an external drive and a few clicks, you’ll never have to worry about losing important files again.
🔍 FAQs: Time Machine on Mac
Q1. Can I use the same drive for multiple Macs?
Yes, as long as there’s enough space. Time Machine will create separate folders for each Mac.
Q2. What if I run out of space on my backup disk?
Time Machine will automatically delete the oldest backups to make room for new ones.
Q3. Can I access individual files in a Time Machine backup?
Yes, open the backup in Finder and browse just like a normal folder.
Q4. Do I need to back up if I use iCloud?
Yes. iCloud doesn’t back up system files, apps, or full system states — only certain data.
📎 Related Articles
- macOS Sequoia: Top Features You Should Know
- How to Activate Apple Intelligence Beta on Mac
- Best External Drives for Time Machine (2025 Buying Guide)

